|
|
|
|
Rebutted and Resquared (R & R) Shingles
|
|
Our Extra A and B Clear grade shingles are R & R. They are distinguished by their perfectly straight butt, perpendicularly square with the shingles two fully parallel sides. As a result, Cape Cod Siding R & R shingles ensure enhanced beauty and substantial savings in installation time and costs.
|
|
|
|
|
Kiln-Dried (KD) Shingles
|
|
Our dehumidification kiln enables us to manufacture shingles
(grades A and B) having superior stability. When selected for the
kiln, the shingles are prepared to ensure uniform dryness (approx.
12% humidity) and to prevent cracking. For optimal protection,
all of our painted KD shingles are boxed.
|
|
|
Weathering Stained Shingles
|
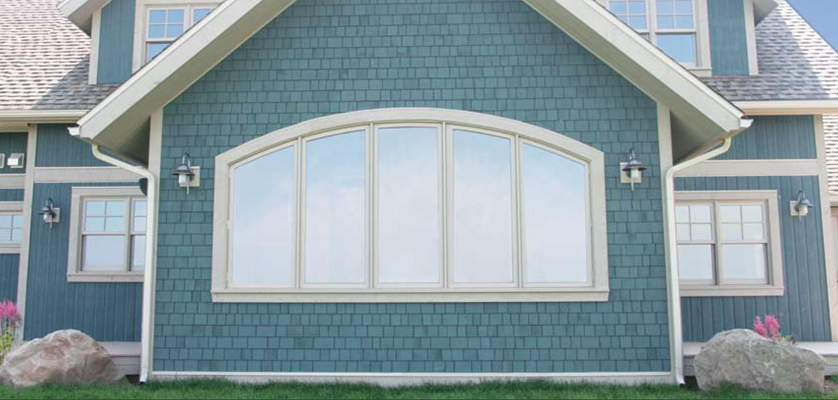
Cape Cod Siding uses Weathering Stain in order to offer silvery gray ready-to-install shingles. In fact, the product accelerates the woods natural weathering process while ensuring an attractive, uniform, low-maintenance finish. Our KD shingles are individually dipped in the stain for maximum protection. The stains unique water-repellent formula provides improved wood stability and resistance to cracking, blistering and peeling.
* No warranty on weathering stain product.
|
|
|
|
|
Factory-Coated Shingles
|
|
Available in an unlimited range of colours. In collaboration with PPG, we offer a long-term warranty program against flaking and peeling; 15 years for 2 coats. Our factory-coated shingles offer the best of both worlds, the natural beauty of real wood and the durability of a prestained product.
|

|
|

|

|
|
Specifications - General
|
|
|
|
Length:
|
Approx. 15 1/2 to 16 (39.4 to 40.6 cm)
|
|
Width:
|
Approx. 3 1/4 to 11 (8.3 to 27.9 cm)
|
|
Butt thickness:
|
3/8 (1 cm)
|
|
Bundling:
|
Area covered per bundle (box):
25 sq. ft. (2.32 m2) with a 5 (12.7 cm) exposure
|
|
Bundles (boxes per square)
|
4
|
|
Calculating the Quantity Required
Area Covered by 1 square (4 bundles)
|
|
|
|
Common Exposures
|
Area Covered
|
|
4 (10.2 cm)
|
80 sq. ft. (7.4 sq. m)
|
|
5 (12.7 cm)
|
100 sq. ft. (9.3 sq. m) standard
|
6 (15.2 cm)
|
120 sq. ft (11.2 sq. m)
|
|
|
Specifications - Grade
Eastern White Cedar Shingles are available in 2 grades, each
having its own distinctive features and applications
|
|
|
GRADE
|
CHARACTERISTICS
|
Extra A
|
Top grade
No imperfections
|
B Clear
|
Select grade
No imperfections
on exposed surface
(up to 6 or 15.2 cm)
|
|
|
|
Material Source: Cape Cod Eastern White Cedar shingles are EUTR compliant, this is your guarantee of a legally procured product.
|
|
Installation Guide
Exposure: To prevent buckling, use a 5 (12.7 cm) maximum exposure.
Fasteners: Stainless steel nails or staples. 1 Ό to 1 ½ (3.1 to 3.8 cm) long.
Fasteners must penetrate at least ½ (1.3 cm) into the underlayment. For staples, use
7/16 (1.1 cm) minimum crown.
Ventilation
It is important to ensure adequate circulation of air underneath shingles in order to enhance their durability, reduce moisture and save energy.
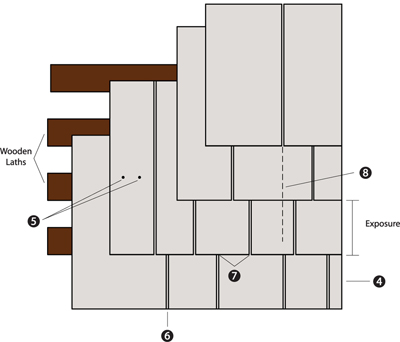
Install horizontal wooden laths, setting them apart by a distance equal to the exposure (centre to centre). Nail shingles directly to them.
|
|
General Installation Instructions
|
|
|
1.
|
Always work from the bottom to the top.
|

|
|
2.
|
To calculate the number of courses to be installed:
|
|
-
|
Measure the surface area to be covered and divide by the desired exposure.
|
|
-
|
Adjust the exposure to produce even courses.
|
|
-
|
Leave at least 4 (10.2 cm) for the last course at the top.
|
3.
|
Draw a line or use a board to align shingles horizontally.
|
4.
|
For the first row, always lay a double course of shingles and offset them by at least 1 ½ (3.8 cm) so that joints do not line up. The bottom course should extend at least 1 (2.5 cm) from the top of the foundation.
|
5.
|
Use 2 fasteners per shingle at about Ύ (1.9 cm) from each edge. And at 1 (2.5cm) above the butt-line of the overlapping single. If shingles are wider than 8 (20.3 cm) use 2 additional fasteners driven 1 (2.5 cm) apart near the center of the shingles.
|
6.
|
Leave a gap of approximately 1/8to Ό (0.3 to 0.6 cm) between neighboring shingles to allow for expansion due to moisture.
|
7.
|
Joints of successive courses must always be offset by at least 1 ½ (3.8 cm) to prevent water build-up. Treat shingle imperfections the same way.
|
8.
|
Never allow joints from any 3 consecutive courses to line up.
|
9.
|
For other Cape Cod Siding and Trim products, refer to the Cape Cod Siding Installation Instructions.
|
|
|
Angles, Corners, Openings, Edges
|
Flashing, which comes in various materials, sizes and shapes, is required for all of the above features. It is important to ensure that local
building codes are respected. Depending on the risks of seepage, flashing generally extends approximately 4 to 8 (10.2 cm to 20.3
cm) on either side. In addition to concealing structural cutting imperfections that may occur, appropriate, properly installed flashing
is instrumental in preventing rotting, water and insect infiltration. When installing flashing, care must be taken to not drive nails near
the center, especially in the case of roofs. It is also recommended that joints in infiltration-prone area be caulked.
|
|
|


